1. First we start with a Site of some sort (this may be a Sub Site). In this instance we are going to create a two Form Libraries (in this case my Subsite is called 'test' which is http://m7net/test). Click on Site Actions > Create (or View all site content > Create) and click on 'Form Library' under Libraries. Give the Form Library a name such as "Forms" or "Form templates" and click Create.
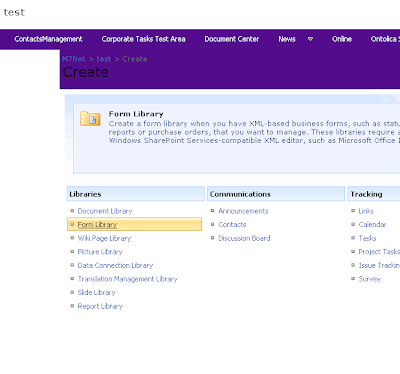
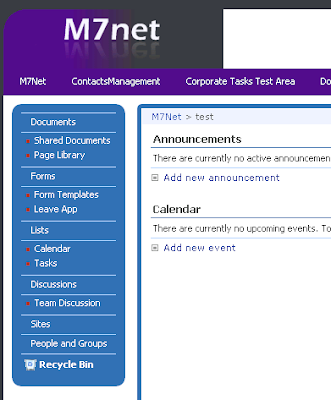
Once you have done this we are going to create another form library with the name synonymous to the form you are going to create. The idea of this is to have all of your forms templates in one library and then the submission library (ie: the library where you specify the form to submit to) named as the form you are creating. In this case I am going to create a pseudo leave application request form, so I will create another form library called 'Leave App'.
So now you should have two form libraries as can be seen below. You can add a quick launch heading called "Forms" if you like to organize your quick links (as I have done).
2. The next step is to create the InfoPath form itself.
Always remember: When creating InfoPath forms it is important to write out and plan the required data sources.
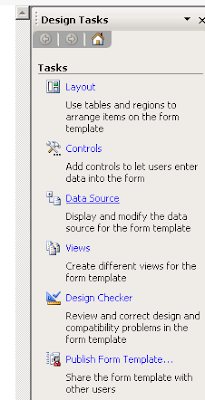
Start by creating the data sources you need. First click on 'Data Source' under the design tasks in the right hand pane.
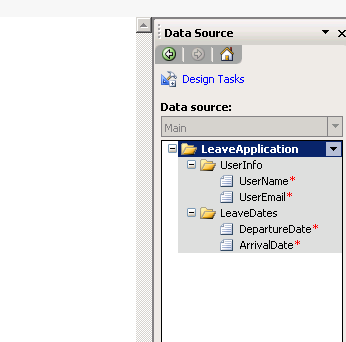
3. Go Ahead and create the fields you require for your and remember to give them an appropriate name and Type. Also you can check 'cannot be blank'. At this point you may want to also create some 'groups' to group your fields. This is done in the same way you create the fields, except change the 'Type' to be 'Group' instead of 'Field'. So you could have a group called 'LeaveDates' then have two fields as children of that group names 'DepartureDate' and 'ArrivalDate' for example.
The best method is to rename the 'myFields' to something more relevant (in this case 'LeaveApplication') and then create sub groups to 'hold' your fields. This is a great way to structure the data and also create 'sections' in your form. Sectioning allows you to create repeating sections and organize your form easier. In the example here I have created two sub groups named 'UserInfo' and 'LeaveDates' with fields 'UserName' (Datatype: text string), 'UserEmail' (Datatype: text string), 'DepartureDate' (Datatype: date) and 'ArrivalDate' (Datatype: date) respectively.
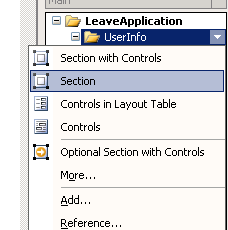
4. Right click on each of your groups (Except the top parent group 'LeaveApplication') and click on 'Add Section' this will add sections to your form.
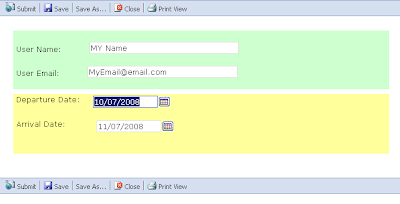
5. Now right click on the fields that you have added and select which type of field input you would like users to use. So right click on the 'UserName' field and click on 'Text Box', also right click on your date fields and click on 'Date Picker' this adds input fields to your form and automatically associates them with your data source. You should have a basic form that looks like this (if you are following this guide like for like).
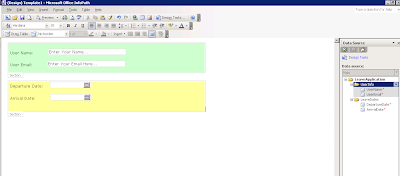
Hint: You can modify the formatting, borders and shading of a section as I have done in the above image.
6. You can add as many sections fields and views as you like, however for the purpose of this blog I will stick to this basic 4 field form. The first thing to do is change the form options to enable this form to be filled out in a browser and also modify the submit options to submit into our 'Leave App' form library. (For an in depth look at changing views on forms check out Andrew Florendine's Blog which has a fantastic posting regarding InfoPath form views).
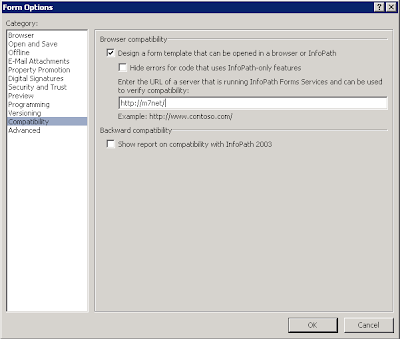
7. Once you are satisfied with your form click on tools > form options. click on 'Compatibility' and then check the option to 'Design a form template that can be opened in a browser...'. Type in your SharePoint server name here to check for compatibility. Click ok when you are done.
8. Now to tell the form to submit to the other document library. Click Tools > Submit Options. Check 'Allow Users to submit this form', change the drop down to a 'SharePoint document library' and click on 'Add...' to add a new data connection.
Enter the document library (http://m7net/test/Leave%20App/ in my case) and also create a concat for the default document name (I have used concat("Leave Application -", UserName) however it would be beneficial to put a date in the concat). Click next and then rename your data connection from 'Main Submit' to 'SharePoint Submit'.
9. Click on File > Publish. If you haven't saved the file yet InfoPath will prompt you to do so. Once you have saved the file to a location, the publish window will come up. Check the option box 'To a SharePoint server...' click next. Type in your server name and click next. Check 'Enable this form to be filled out in a browser' also check the 'Administrator Approved form template (advanced)' option and click next. Pick a file location and click next (make sure you pick a relevant file location, for instance if your working of c:\development\forms, save the file to c:\development\forms\deployment\
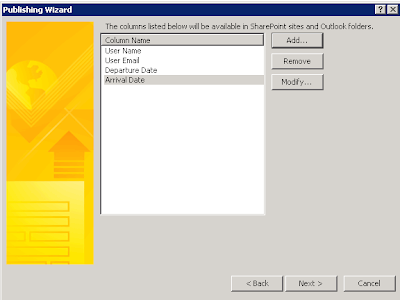
Click publish.
10. Now the next step is to upload the template and add it to your document library. Open central administrator, click on Applications and under InfoPath Forms Services click on 'Manage form templates'.
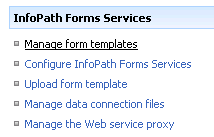
11. Click on 'Upload Template' and browse to where you published your form template. Once you have found your form click 'Upload'.
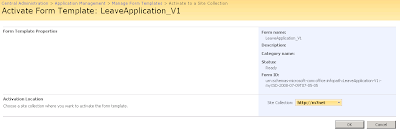
12. Now your form is uploaded, click on the form and click on 'Activate to a Site Collection'. Change 'Activation Location' to your Site Collection and click ok.
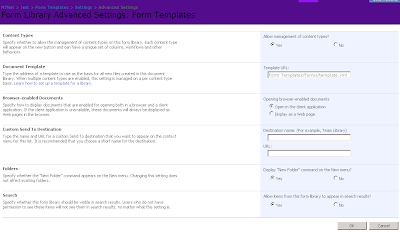
13. Now it is time to add your newly uploaded form template to your 'Form Templates' document library. Click on your form template library (in my case 'Form Templates'). Click on 'Library Settings' then click on 'Advanced Settings'. On this new screen click on 'Yes' under 'Allow management of content types?' and click on 'Display as a Web Page' then click on 'Ok'.
14. Click on 'Add from existing site content types'.
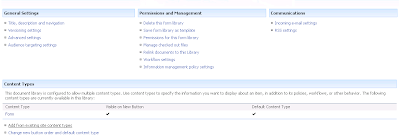
15. Select the form you have activated in the previous steps, click on 'add' and then click on 'ok'.
16. Now click on 'Change New Button Order and Default Content Type' just below where you clicked on 'Add from existing content types', uncheck the 'Form' option and click on 'Ok'.

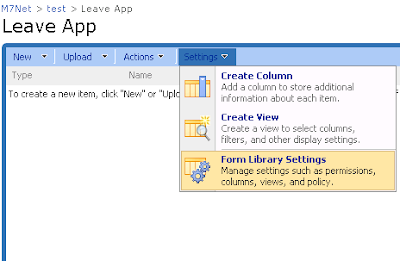
17. Before we can test the form we need to add the columns we have promoted to the form library. Click on the 'Form Library Settings' and under Columns click on 'Add from Existing Site Columns'.
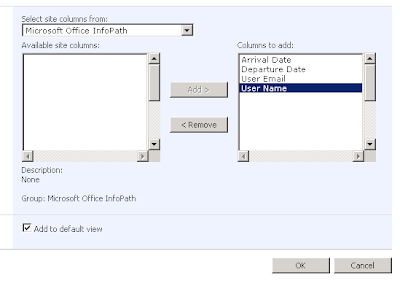
Click on the drop down box and select 'Microsoft InfoPath', this will give you the columns that you have promoted from the fields in your InfoPath form. Select them and click on 'Add' to move them to the right pane. When you are done click ok.
18. Now go back to your Form Templates form library and create a new form by clicking the 'New' and selecting your form. Please keep in mind that this new form page is linkable by copying the URL in the address bar when you have the form open. This means that you can create links within your SharePoint site that link directly to this form.
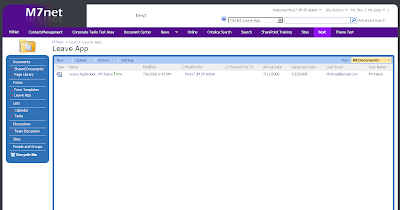
19. Once you have submitted the form go to the 'Leave Application' document library (the library where you set the form to submit to) and review the form, notice that the fields have been promoted into the columns. You can now create and modify views to suite which data you would like to expose.
The Reason I like to do it this way:
The reason I prefer to use administrator approved templates rather than just publishing the form directly to a library is because if you publish straight to a library and then create a new version of the form and upload it, SharePoint creates duplicate columns promoted form your new form. These columns are then un-deletable and you are stuck with 2 or 3 (if not more) un-deletable columns in your column gallery (which is very annoying). Also the reasoning behind separating your template form library and your submission document library is for security purposes, this allows you to manage the permissions of the submission libraries separate to the template library. This also allows you to keep the templates separate to your form libraries. This in my mind is a cleaner way of doing things, however it is also acceptable to load the templates into their respective submission libraries.


